|
|


|



Title: Resize an image so it has desired margins in Python and PIL, redux
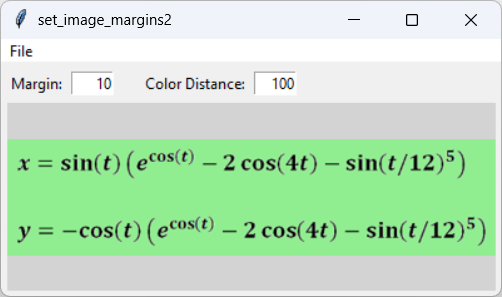
My post Resize an image so it has desired margins in Python and PIL resizes an image so it has desired margins. To do that, it finds the outer pixels that are white. It then resizes the image so those pixels occupy the desired margin width. Recently I needed to set margins for an image but the outer pixels weren't white so the previous program didn't work. This example handles that situation and creates a margin no matter what color the outer pixels have. Rewriting the CodeThis actually only required a couple of changes, shown in blue in the following code.def set_image_margins(image, color_distance, margin): '''Size the image so it has margins of the indicated size.''' # Convert to RGB mode. image = image.convert('RGB') # Load the pixel data. pixels = image.load() # Get the margin color. margin_color = pixels[0, 0] margin_r, margin_g, margin_b = margin_color # Find the non-white pixel bounds. xmax = 0 xmin = image.width ymax = 0 ymin = image.height for y in range(image.height): for x in range(image.width): r, g, b = pixels[x, y] dr = abs(r - margin_r) dg = abs(g - margin_r) db = abs(b - margin_r) if dr + dg + db > color_distance: # Manhattan distance. if x < xmin: xmin = x if x > xmax: xmax = x if y < ymin: ymin = y if y > ymax: ymax = y # Crop to include just the bounding area. image = image.crop((xmin, ymin, xmax + 1, ymax + 1)) # Make the new image. wid = 2 * margin + image.width hgt = 2 * margin + image.height new_image = Image.new('RGB', (wid, hgt), margin_color) # Paste the cropped image onto the new image. new_image.paste(image, (margin, margin)) # Return the result. return new_image First, instead of using white as the margin color, this version of the program takes whatever color is in the image's upper left pixel. It gets that color and separates it into its red, green, and blue components.
The color comparison is slightly different from the previous version because that version just checked whether a pixel's color was below a certain brightness level indicating it wasn't white. This version needs to compare the each pixel to the margin color. To do that, the new code calculates the absolute value of the difference between each pixel's red, green, and blue color components and the margin color's components. If the sum of those differences is greater than the color distance entered on the program's form, the code considers the pixel to not be part of the margin. The rest of the set_image_margins function is the same as the previous version. The function crops the image to its non-margin pixels, creates a new result image filled with the margin color and sized for the margins, copies the cropped image onto the result image, and returns the result. ConclusionChanging the original program to handle non-white margins was easy, and the new program can now handle non-white margin colors. There's one more enhancement I may get around to at some point. This program (and the previous version) examine every pixel in the image to find the area of the non-margin pixels. That can take a little while if the image is large. It would be more efficient for the function to examine pixels from the edges of the image moving inward and then stop when it finds a non-margin pixel.If you'd like to try that yourself, go ahead. It'll probably take me a few days to get around to it. Meanwhile, download the example to experiment with it and to see additional details. |